Advanced Figma Settings
Set up auto-detected prototype links and footer detection for one-click Figma to Klaviyo exports.
Heads up: Preview text can now be set directly in Klaviyo along with subject lines. The video above still mentions preview-text detection - that part no longer applies; the link and footer sections are still accurate.
These two settings turn the Figma plugin into a true one-click solution. When both are enabled, you select your frame and click "Send to Klaviyo" - the link addresses and footer are pulled directly from your Figma file. No manual entry needed.
Click the gear icon in the plugin header to access these settings. By default, they are all turned off.
Auto-Detect Prototype Links
This is the recommended way to add click-through URLs to your email sections. Instead of typing links manually in the plugin, you add them directly to your CTA buttons in Figma using the Prototype interaction feature. The plugin reads these links and automatically maps each one to the correct email section.
How to Add Links in Figma
Select your CTA button layer
In your email design frame, click on the button or element you want to be clickable in the final email.
Open the Prototype tab
In the right sidebar of Figma, click the Prototype tab (next to Design and Inspect).
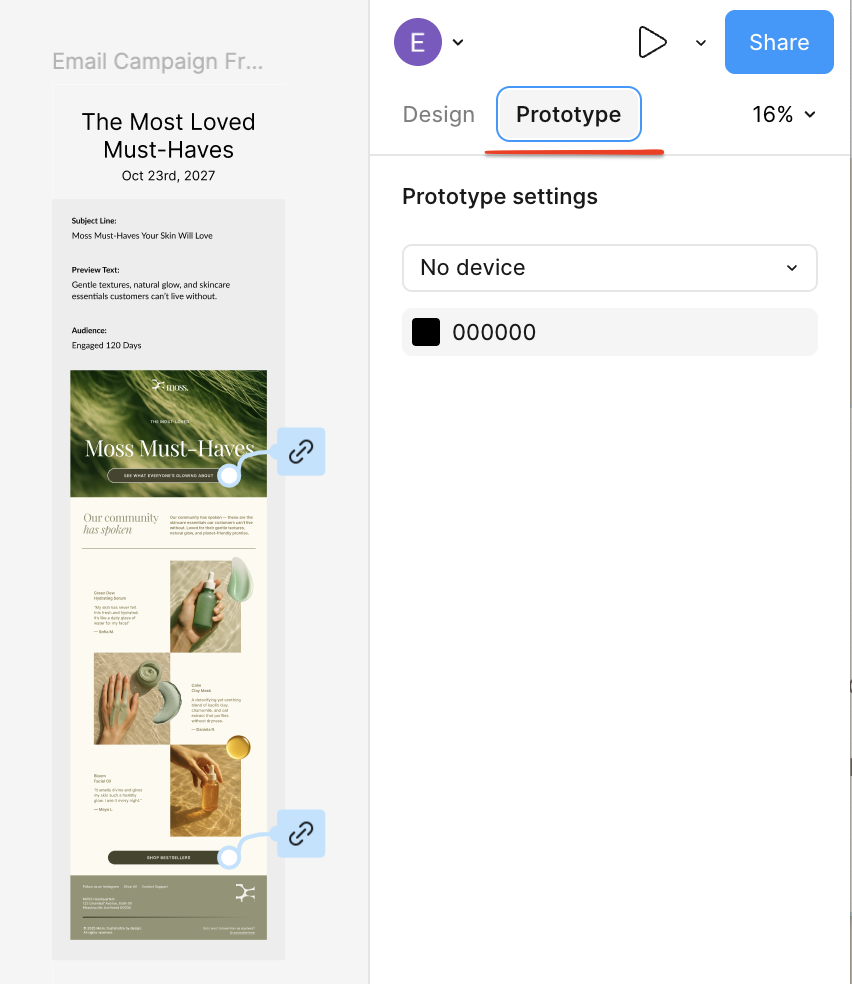
Add an "On Click → Open Link" interaction
Click the + next to "Interactions" to add a new interaction. Set it to:
- Trigger: On Click
- Action: Open Link
- URL: paste your destination URL (e.g.
https://yoursite.com/summer-sale)

Repeat for each CTA button
Add a prototype link to every button in your email that should have a unique URL. The plugin maps each link to the email section that contains it based on its vertical position in the design.
Important: Use Frames, Not Groups
The outermost collection of elements in your email design must be a frame, not a group. If it's a group, the "Add interaction" button won't appear in Figma's Prototype tab. Convert the outer group to a frame if you don't see the interaction option.
If all sections share the same link
If your entire email should link to a single URL, you only need to add one prototype interaction - add it to the lowest CTA button in your design. Each link covers its own section and every section above it (up to the next link), so a single link at the bottom will apply to the entire email.
How link mapping works
The plugin assigns links based on vertical position. Each link covers its section and all sections above it, up to the next link. For example, if you have three CTA buttons with different URLs, the top link covers the top sections, the middle link covers the middle sections, and the bottom link covers everything from its position up to the middle link. Any sections without a link above them use the brand's default website URL set in your Brand settings.
Auto-Detect Footer
Why use this?
Most emails have a footer section - unsubscribe links, social icons, legal text - that should stay together as one piece. Without footer detection, the slicing algorithm might cut through the middle of your footer, splitting it across two sections and breaking the layout.
When this setting is enabled, the plugin identifies your footer and forces a clean slice at the top edge of it. This guarantees the footer is always exported as its own standalone section - which makes it easy to swap out with your Klaviyo footer later. You can either drop in a native Klaviyo Universal Section, or build one with the Footer Builder if you prefer a single HTML block.
How to set up in Figma
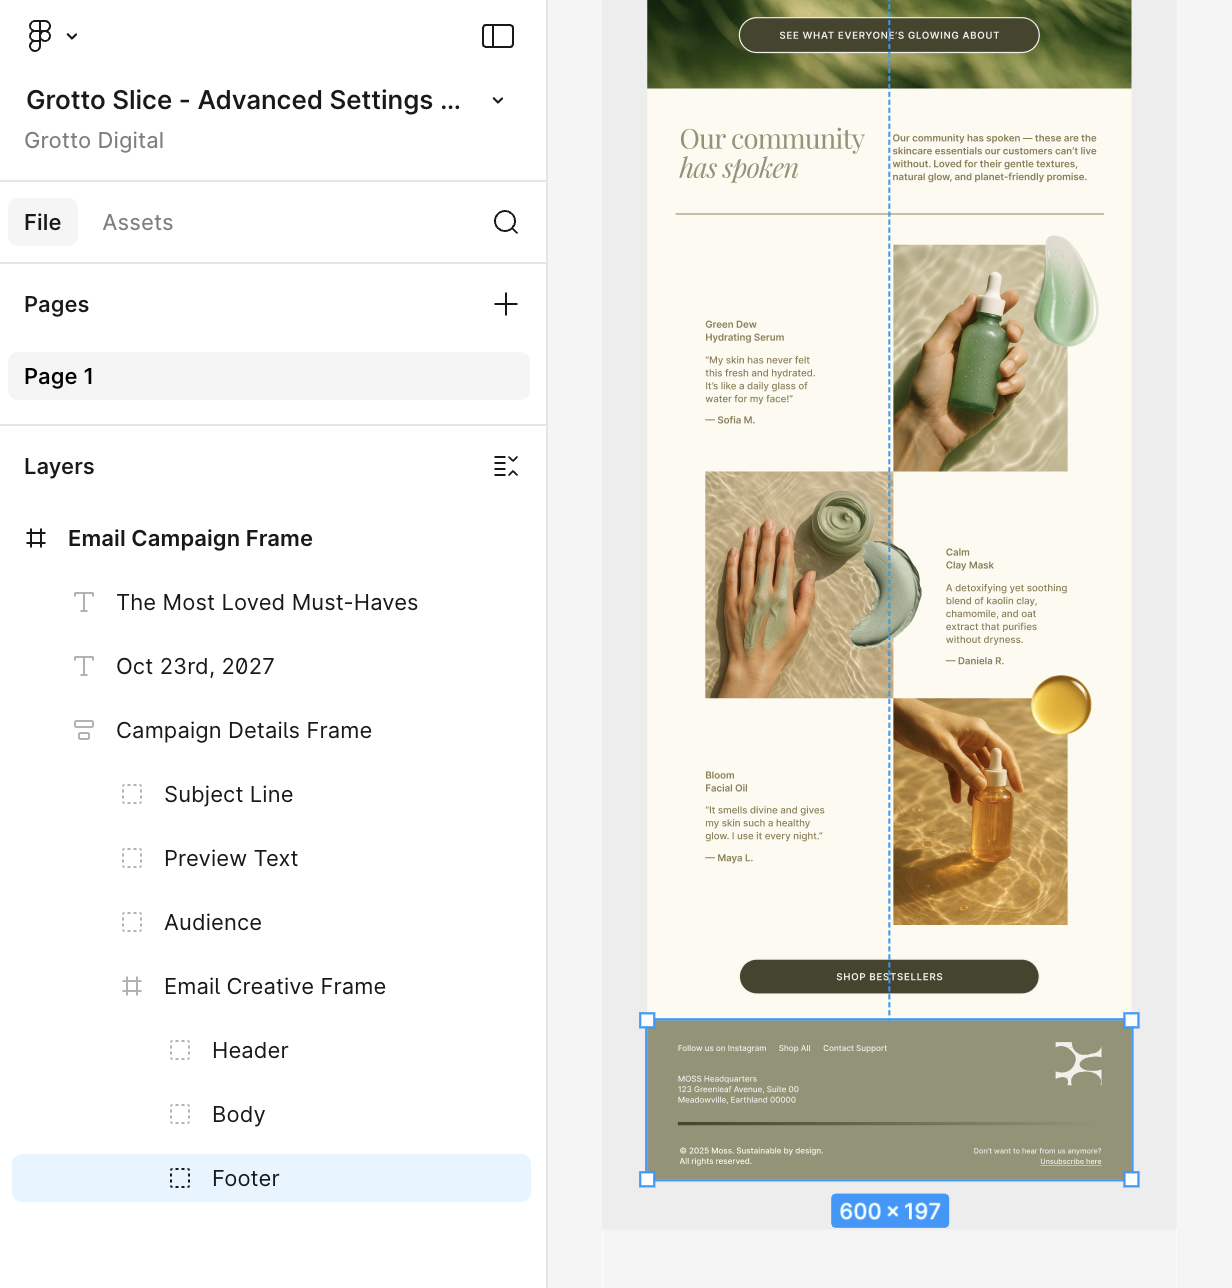
All you need to do is name the group or frame that contains your footer content "Footer" (case-insensitive - "footer", "FOOTER", etc. all work).
Your layers panel should look something like this:
Key details:
- The footer group or frame must be inside your email design frame (not a sibling)
- The name just needs to contain "footer" in any casing
- The plugin forces a hard slice at the top edge of the footer, so everything below that line becomes one section
- Tell your designers to put all footer elements inside one group and name it "Footer"
Frequently Asked Questions
Can I use prototype links instead of a single CTA?
Yes! Enable "Auto-detect link addresses" in the plugin settings. Add On Click → Open Link prototype interactions to any layer in Figma, and the plugin will automatically map each link to the corresponding email section based on its Y position.
Why aren't my prototype interactions showing up?
The outermost collection of elements in your email design must be a frame, not a group. If it's a group, the "Add interaction" button won't appear in Figma's Prototype tab. Convert the outer group to a frame and try again.
Does the footer group need to be a specific size?
No. Just name the group or frame "Footer" (any casing) and the plugin will force a clean slice at the top edge of it. Everything below that line becomes one section you can swap out with your footer block in Klaviyo - either a native Universal Section or an HTML block from the Footer Builder.
Can I still override the auto-detected values?
Yes. Auto-detected links and footer detection are starting points. You can adjust links or slice lines in the Grotto Slice web editor after uploading. Preview text is no longer auto-detected - set subject line and preview text directly in Klaviyo at the campaign level.